To start building a website using the Sitejet Builder website creator on our hosting, you first need to purchase the appropriate service. It will provide access to the editor and server space, ensuring your website is visible on the internet.
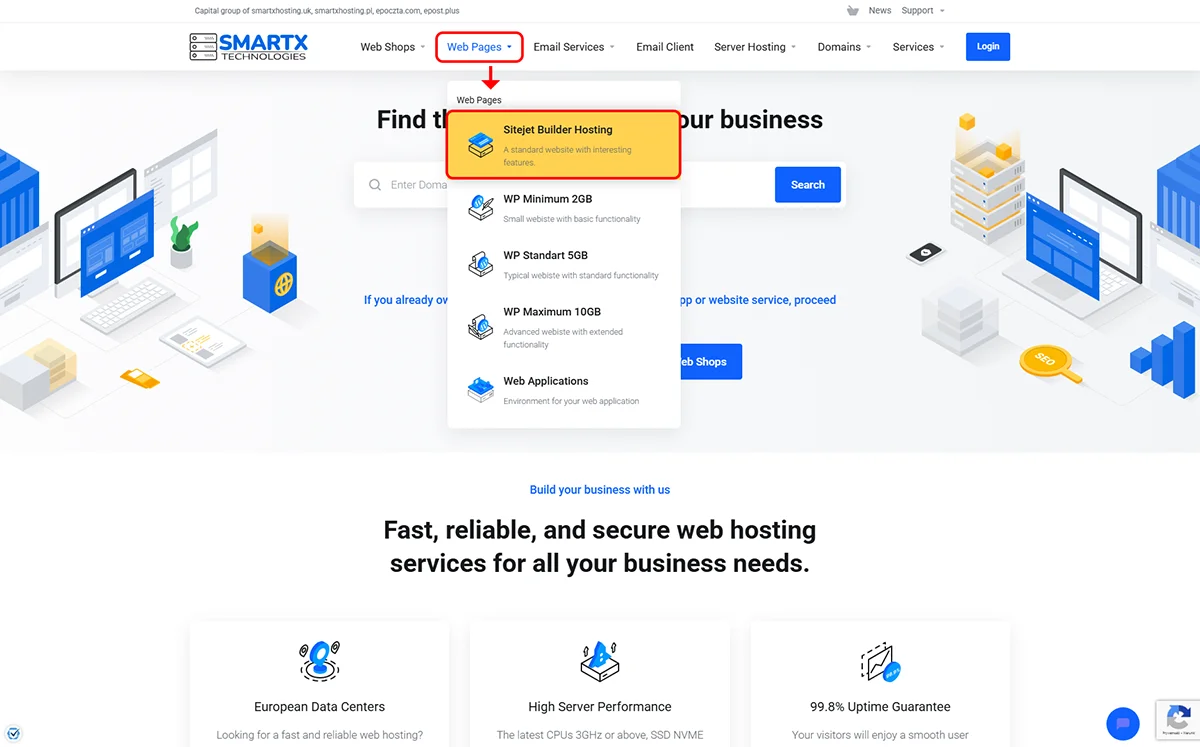
To purchase the Sitejet Builder hosting service, go to https://smartxhosting.uk and select Sitejet Builder Hosting from the Web Pages menu.
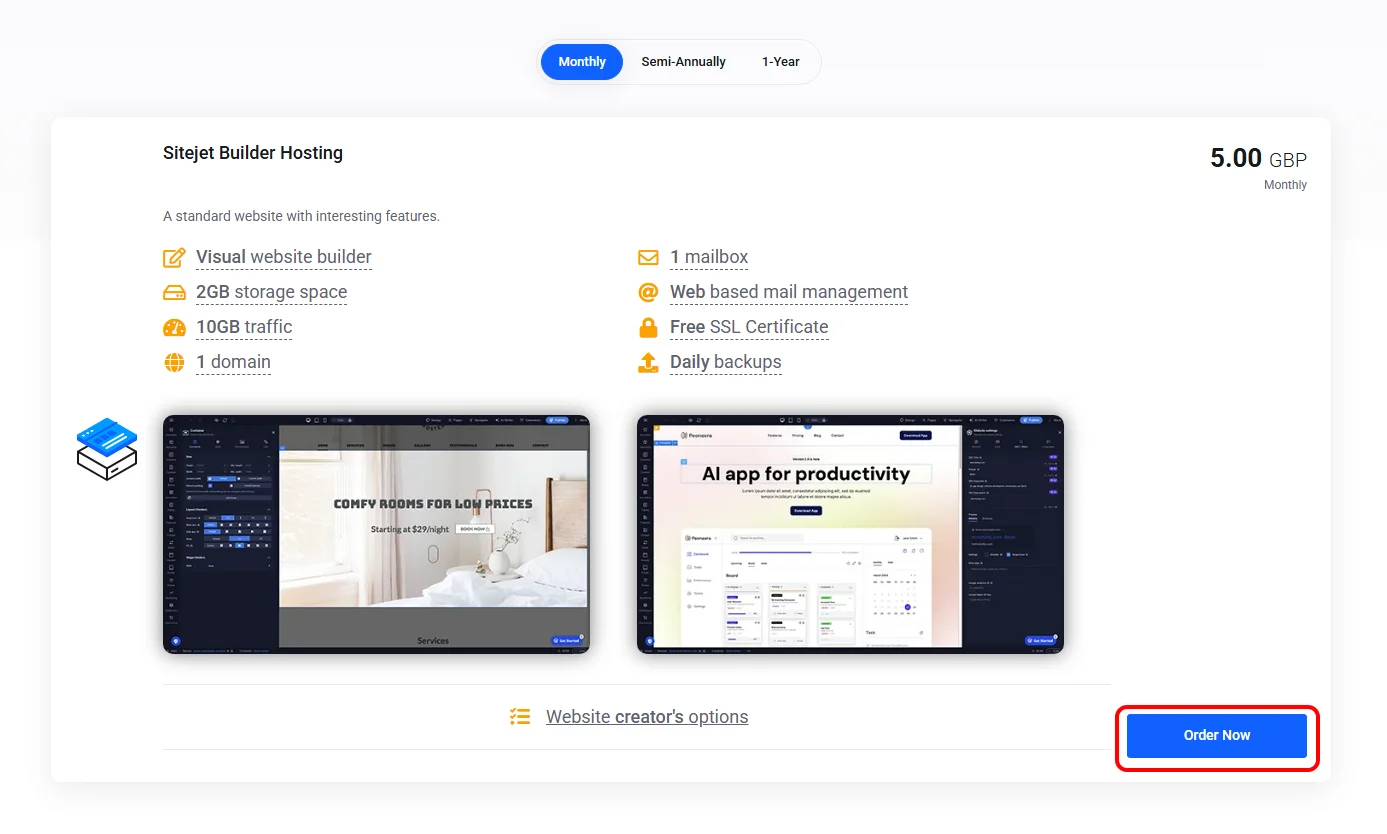
The next step is to add the Sitejet Builder Hosting product to your basket using the Order Now button
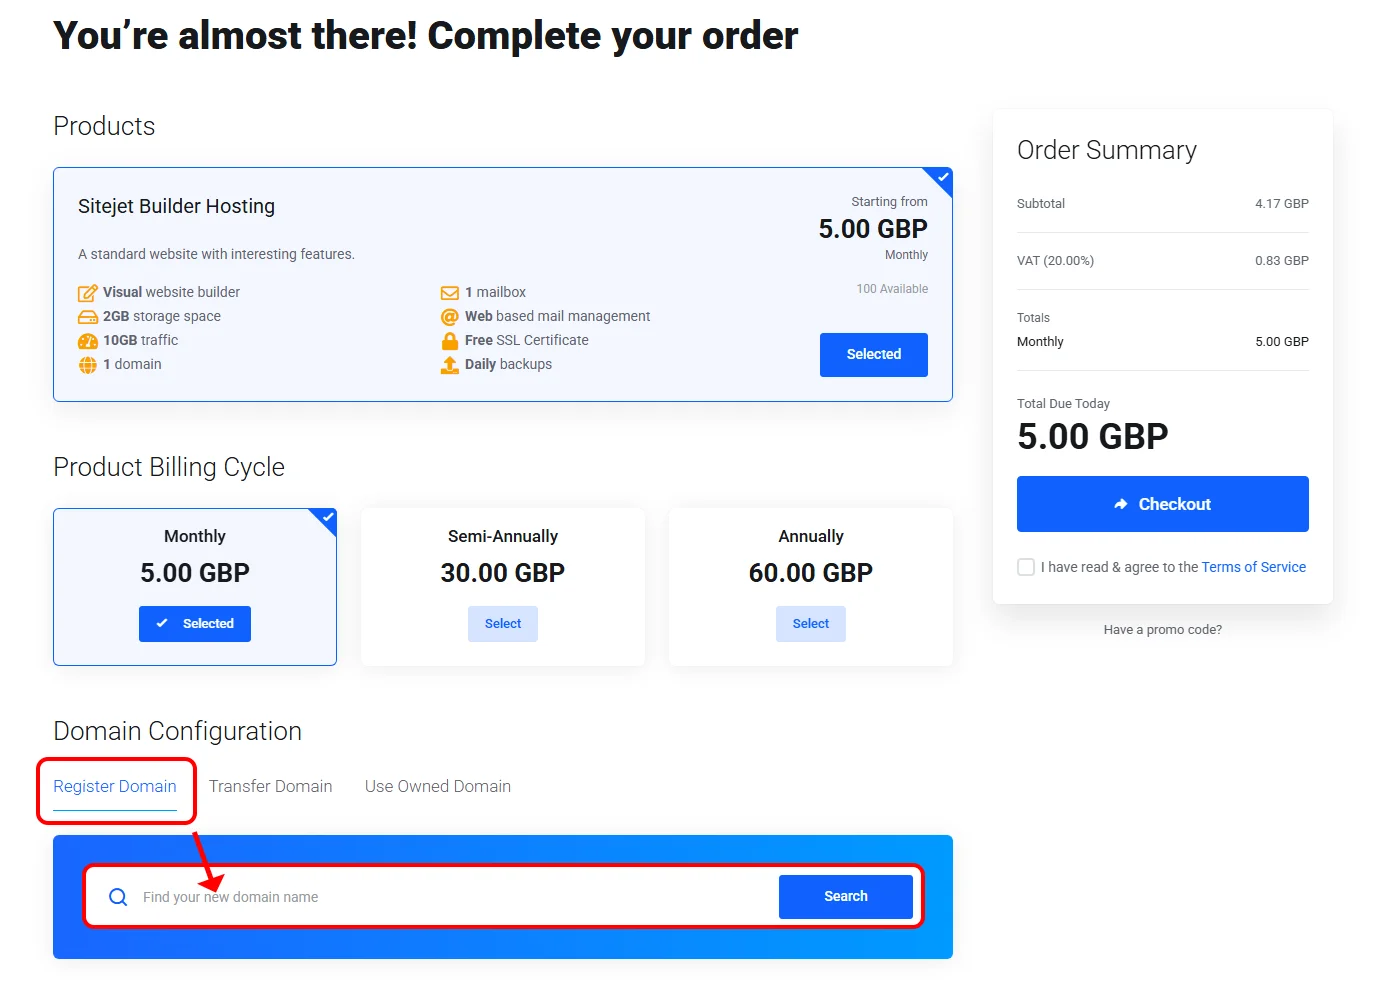
For a website to function correctly, it must have its own address on the internet - a domain name. Therefore, when ordering the Sitejet Builder Hosting service, it is required to provide domain information.
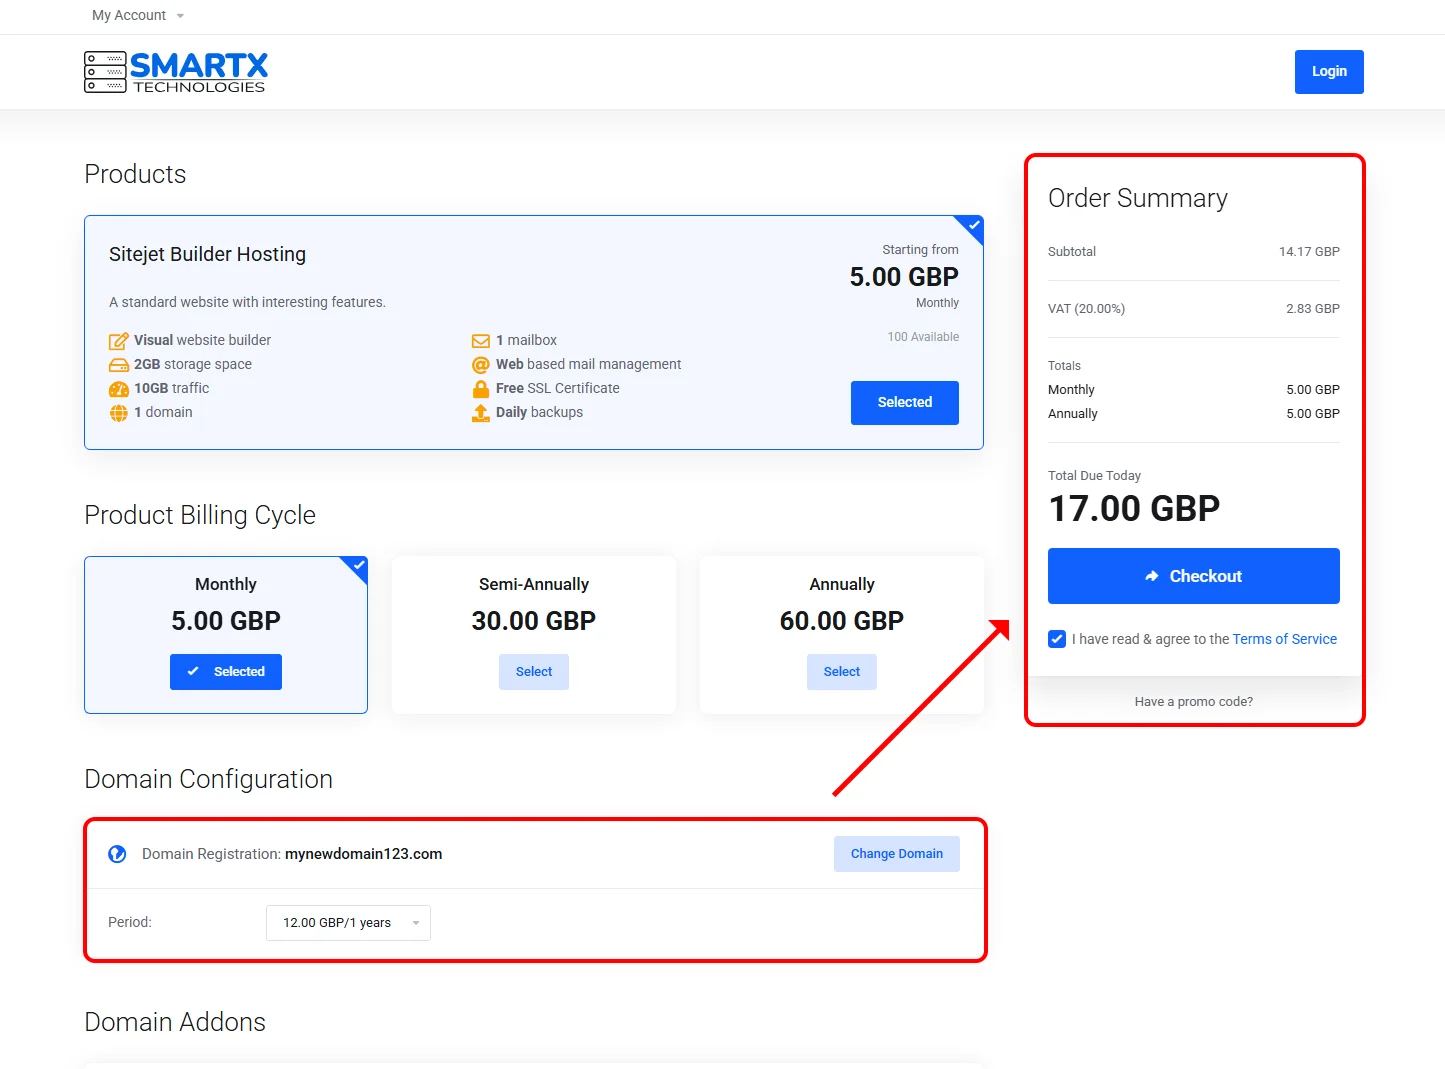
If you do not yet have any registered domain or wish to register a new one for the website you are creating, in the Domain Configuration section select the Register Domain tab. Then, enter the domain name you would like to register and click the Search button.
If the domain you've searched for is available, you can register it by clicking the Add to Cart button.
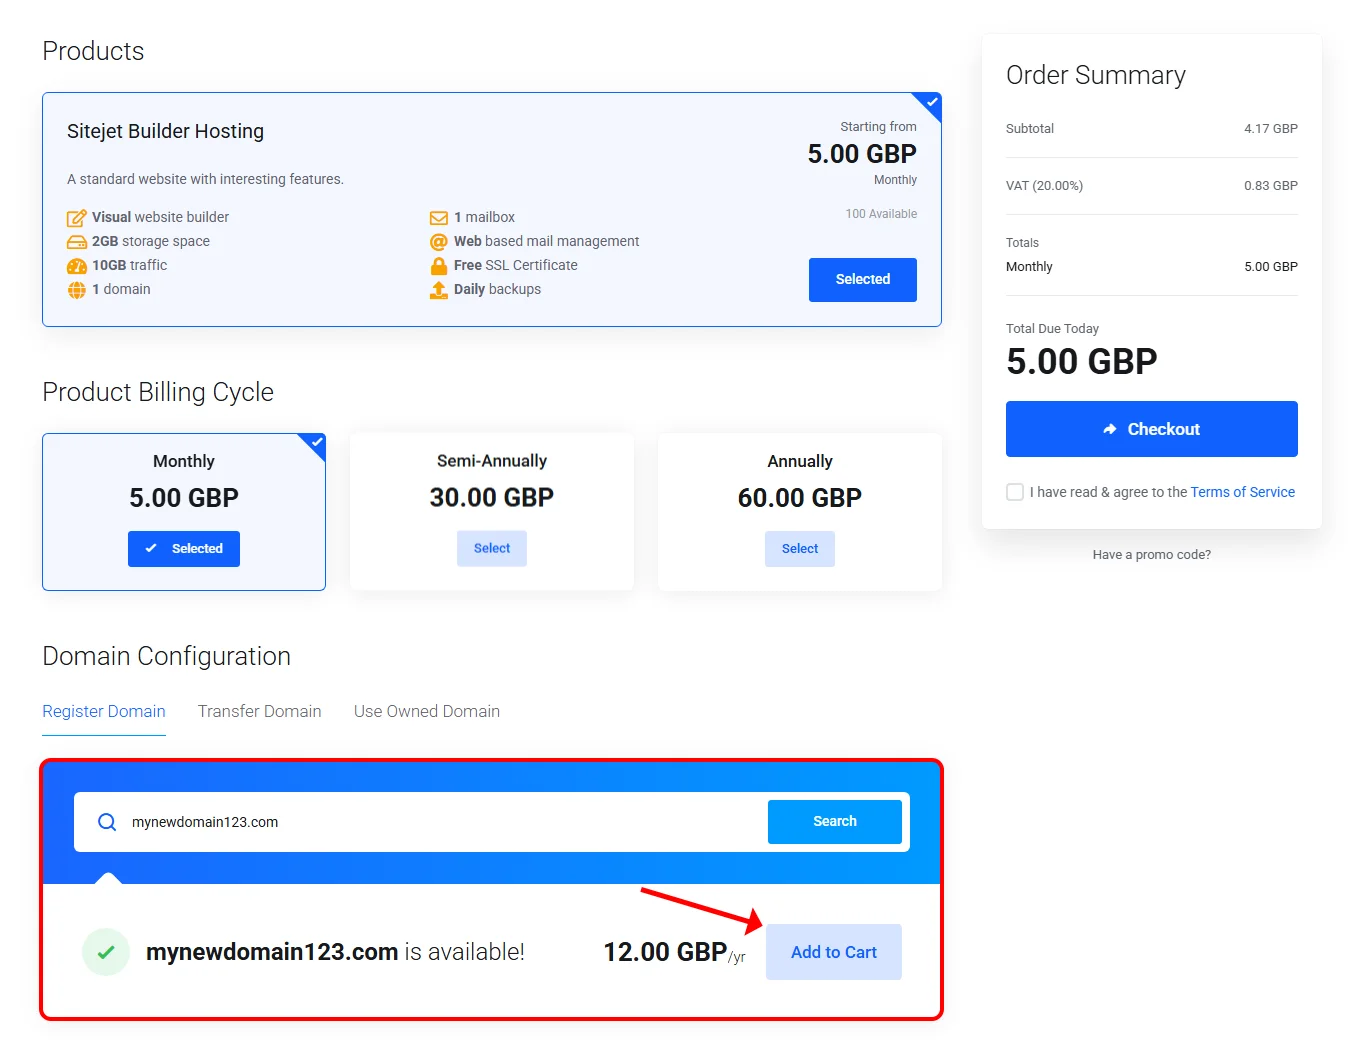
After completing the above steps, the domain will be added to your order. During the finalisation of the order, it will be registered and used to activate the Sitejet Builder Hosting service.
After paying for the order, please follow the instructions in the tab: Operations in the client panel after ordering the service.
To start building a website using the Sitejet Builder website creator on our hosting, you first need to purchase the appropriate service. This will provide access to the editor and server space, ensuring your website's visibility on the internet.
To purchase the Sitejet Builder Hosting service, go to https://smartxhosting.uk and select Sitejet Builder Hosting from the Web Pages menu.
The next step is to add the Sitejet Builder Hosting product to your basket using the Order Now button.
If you already have a registered domain that you would like to use to activate the Sitejet Builder Hosting service, you can add it in the Domain Configuration section. Go to the Use Owned Domain tab, enter the domain name, and then press the Use button.
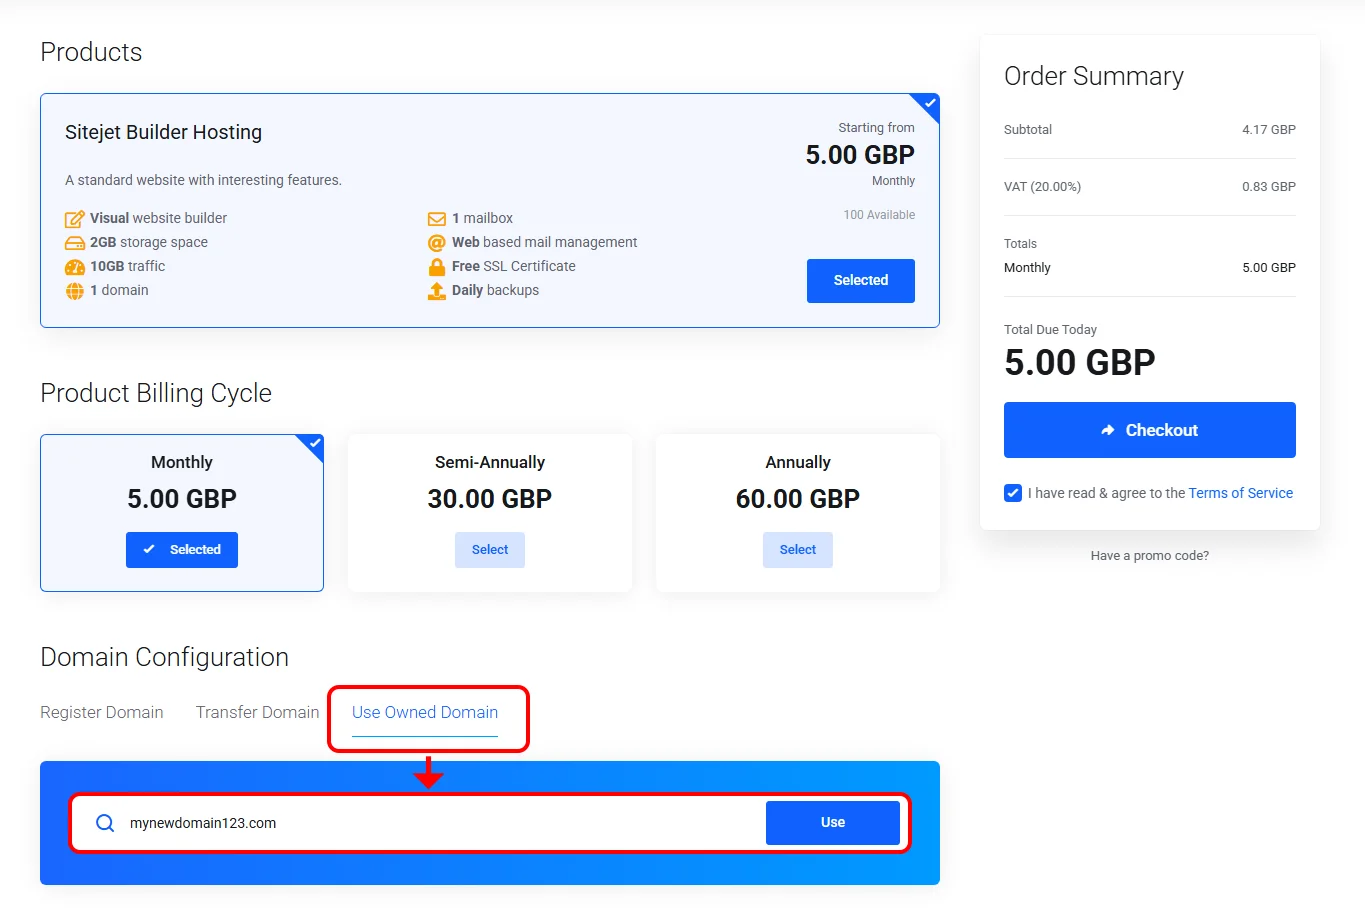
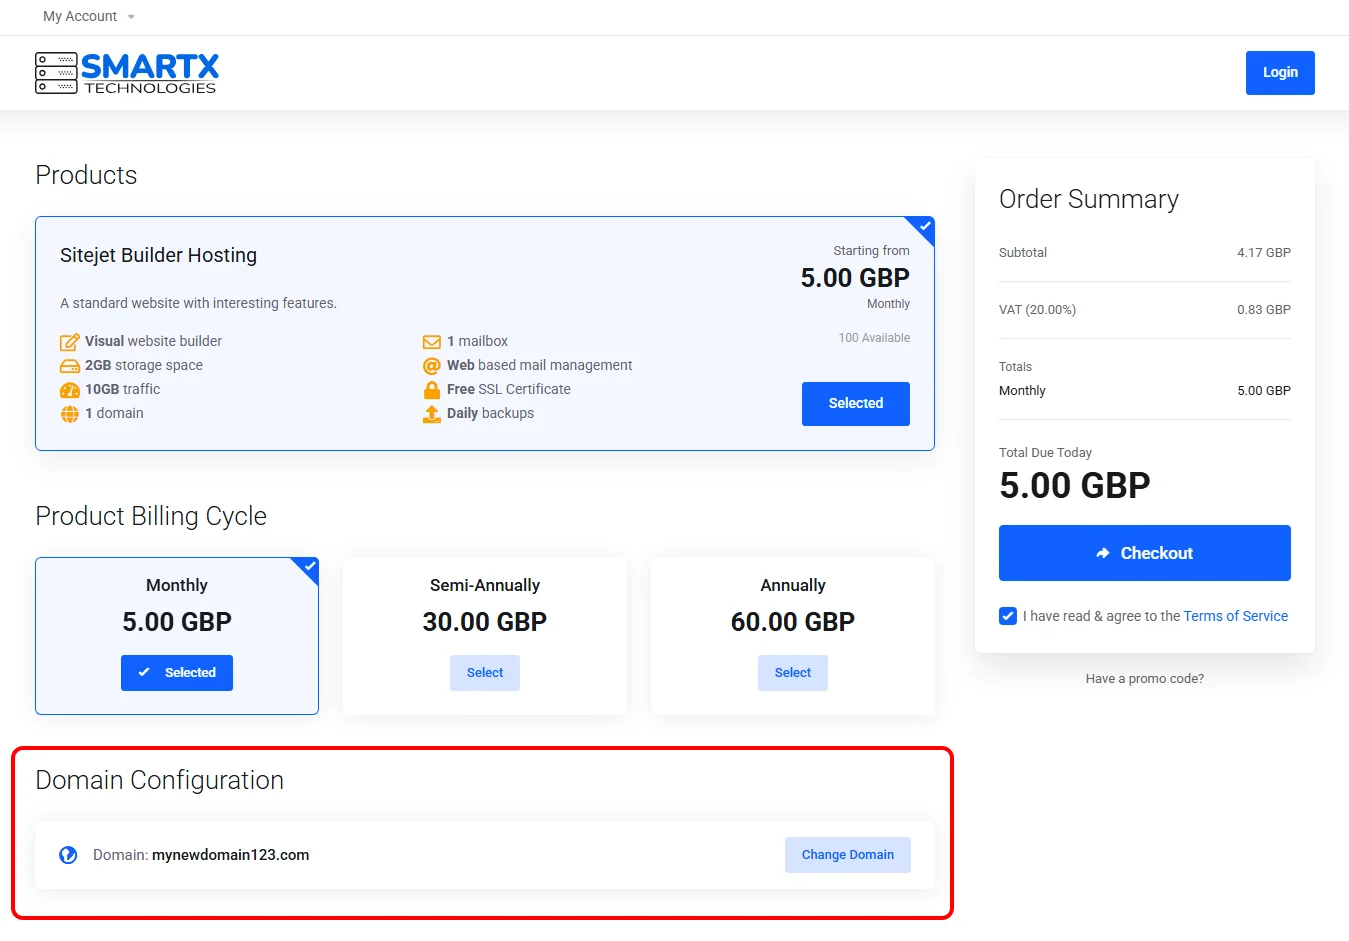
After completing the above steps, the domain will be added to the Sitejet Builder Hosting service configuration
When using your own domain to activate the Sitejet Builder Hosting service, it will be necessary to make changes to the domain's DNS settings. You can find more information on this topic in the Operations in the client panel after ordering the service tab.
After successfully placing an order, you will be logged into the client panel and the invoice for the order will be displayed.
If you selected bank transfer as the payment method when placing the order, the invoice will be marked as unpaid and the service will have a Pending status until the payment is credited. If you chose Stripe and the transaction is successful, the invoice will automatically be marked as paid and the order will be activated.
The next step after placing your order is to go to the Services section in the client panel. Your purchased Sitejet Builder Hosting service will be visible there with status information. If you selected bank transfer as your payment method, you must wait for its activation until the payment is credited. Until then, you will not be able to start building your website.
Once the service is activated, which will be confirmed by the Active status, you will be able to click on it to view its details. These include information such as the billing period, assigned domain, and SSL certificate status. This section also provides access to 2 key functions for website creation: DNS Settings and Plesk.
To start using the service, you need to access the Plesk hosting panel, where Sitejet Builder is running.
If you purchased a domain for your website along with the Sitejet Builder Hosting, go directly to the Plesk panel and start working with Sitejet Builder.
If you already had a domain registered elsewhere when purchasing Sitejet Builder, change the DNS settings at the current registrar.
New DNS settings:
server DNS 1: zac.ns.cloudflare.com
server DNS 2: kallie.ns.cloudflare.com
Please wait a while for our systems to take over your domain.
To launch the Sitejet Builder editor and start building your website, from the client panel click the Plesk tile in the Product Details section. This will automatically log you into the Plesk hosting panel, which enables you to create your site and begin editing.
After logging into the Plesk hosting panel, go to the Get Started tab. There are two options to get started:
1 - AI Website Generator - simply provide your input information, and let the AI build a personalised website tailored to your needs.
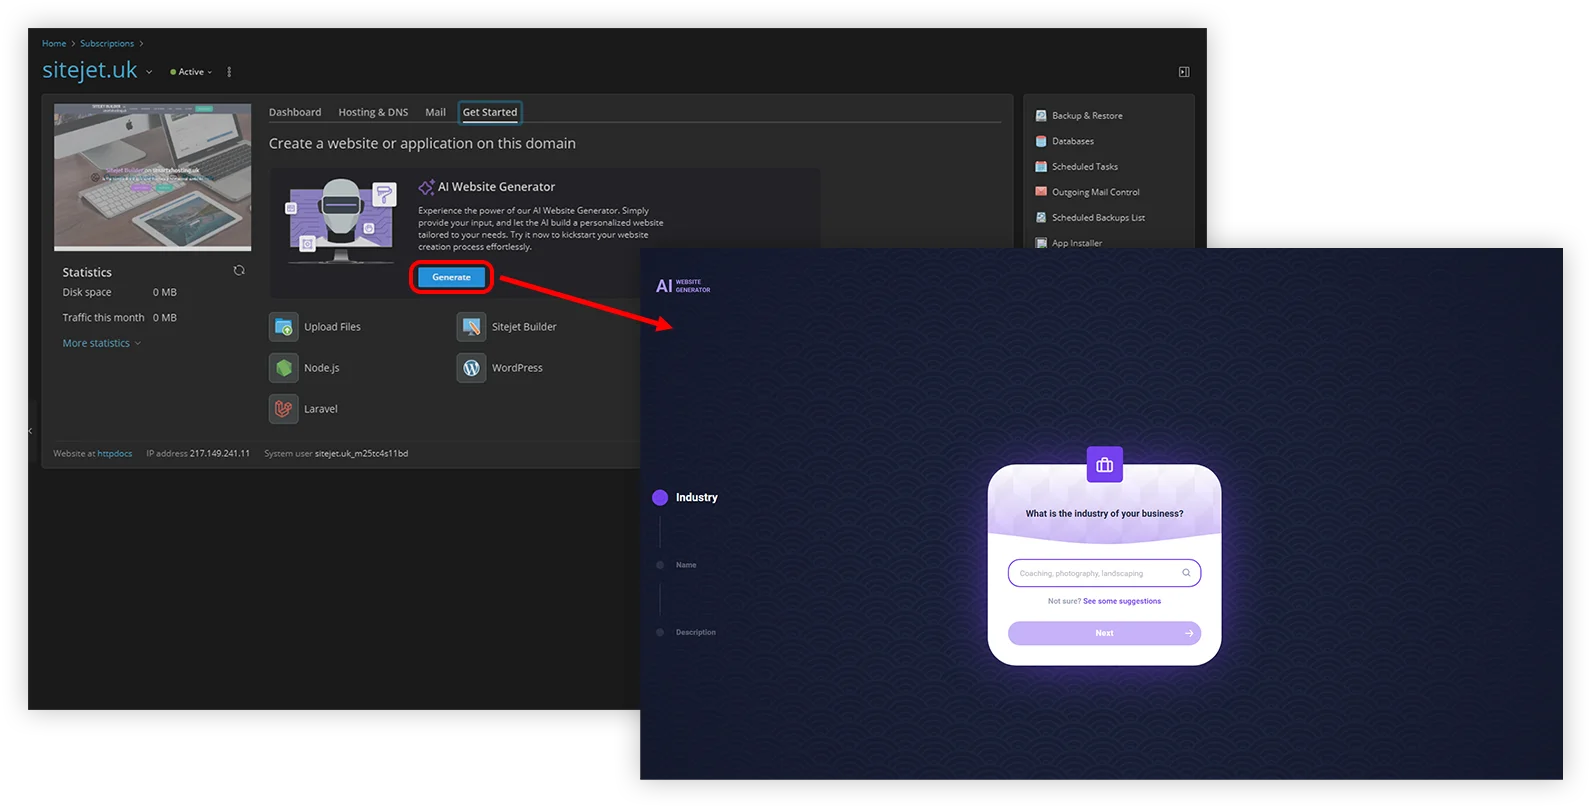
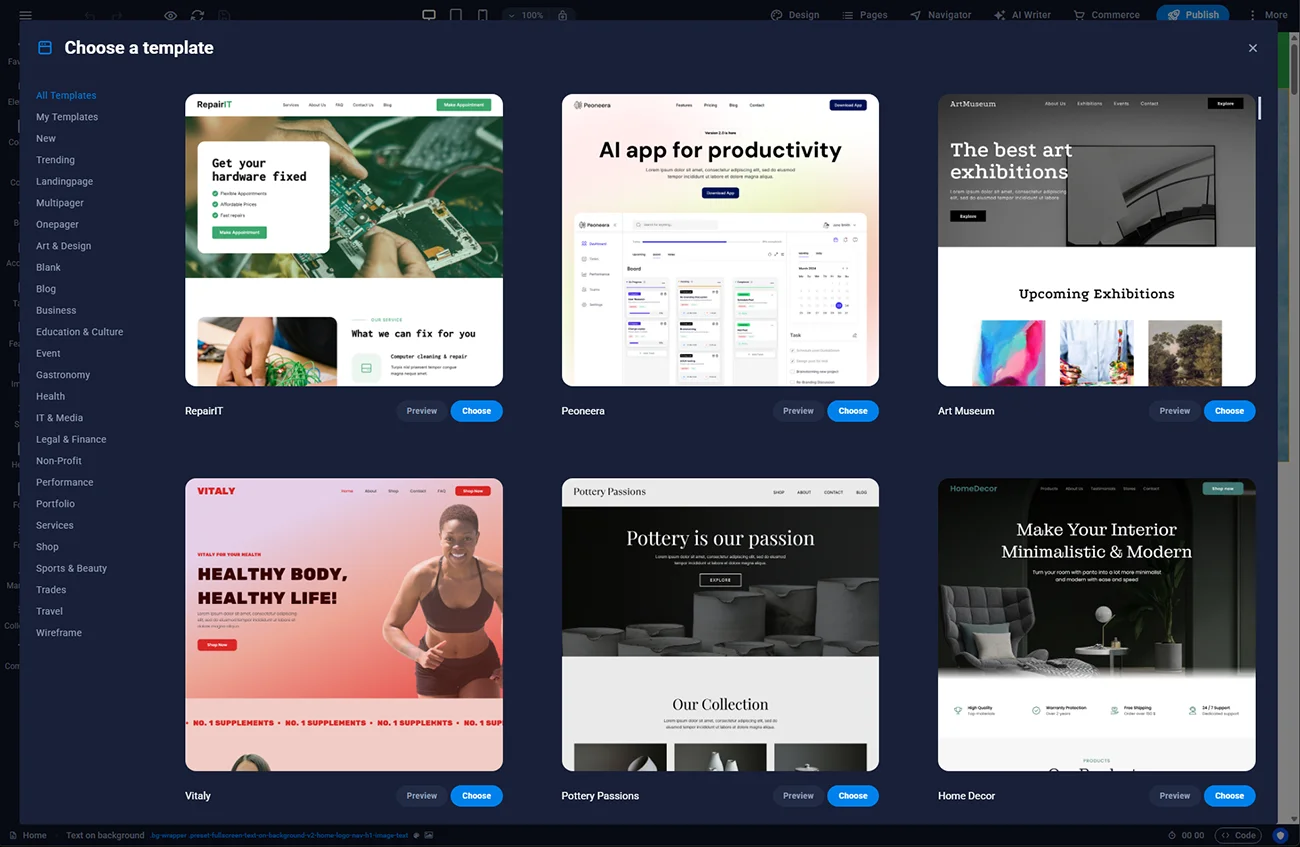
2 - Sitejet Builder Editor - launch the editor, choose a template, and start adding your content.
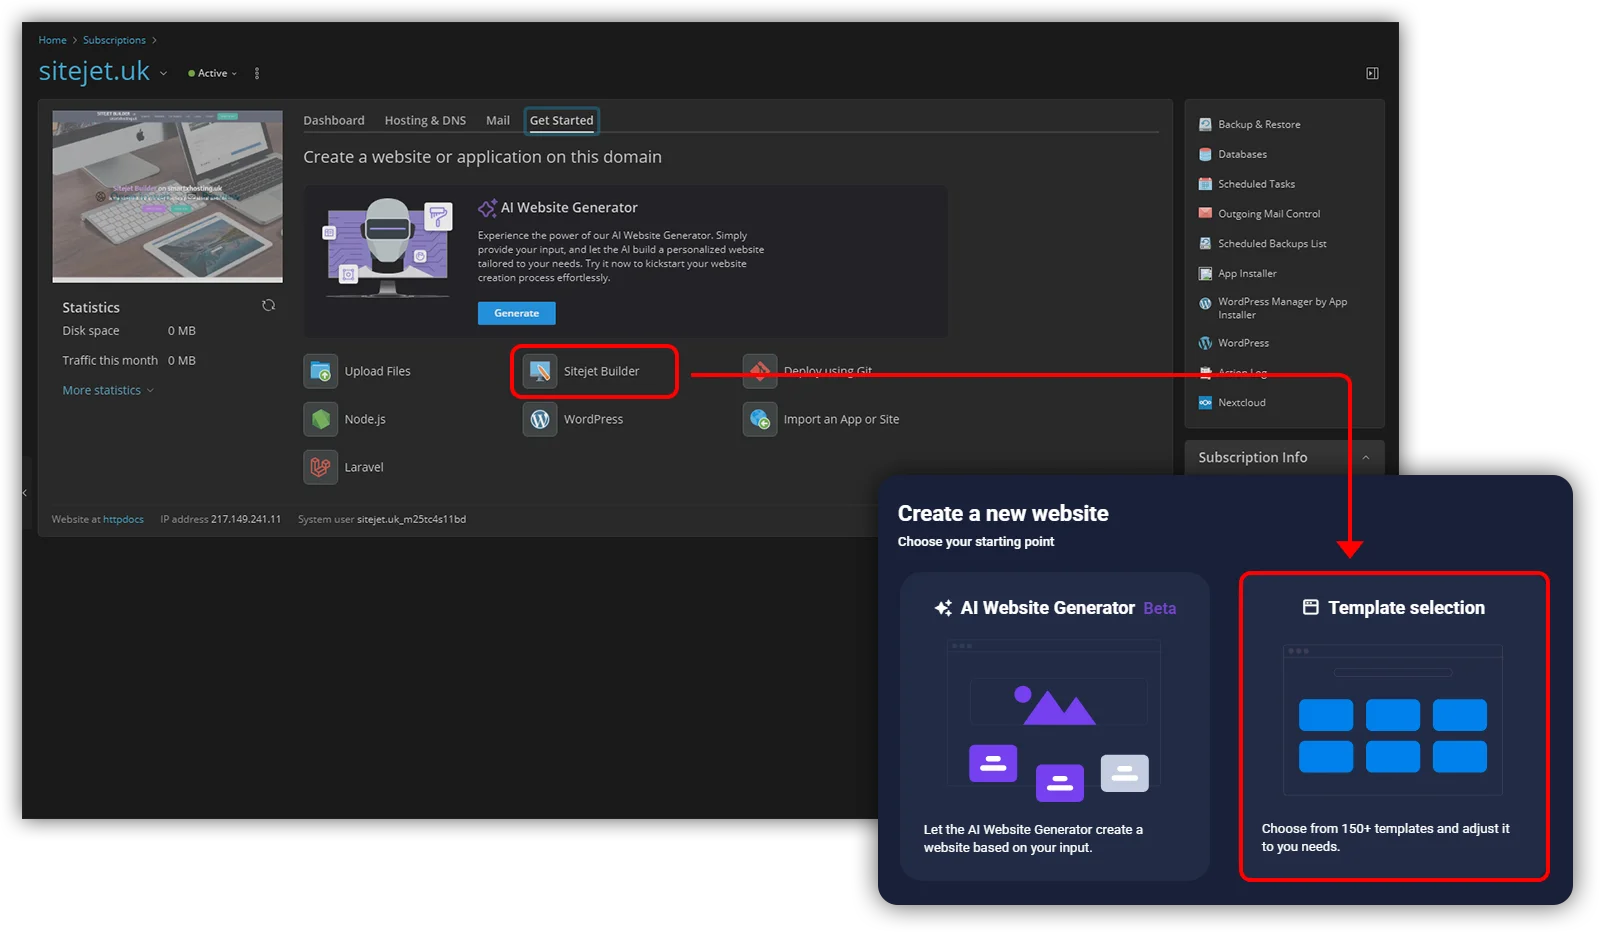
After launching the editor as described in point 1.2, a window with website template options will be displayed.
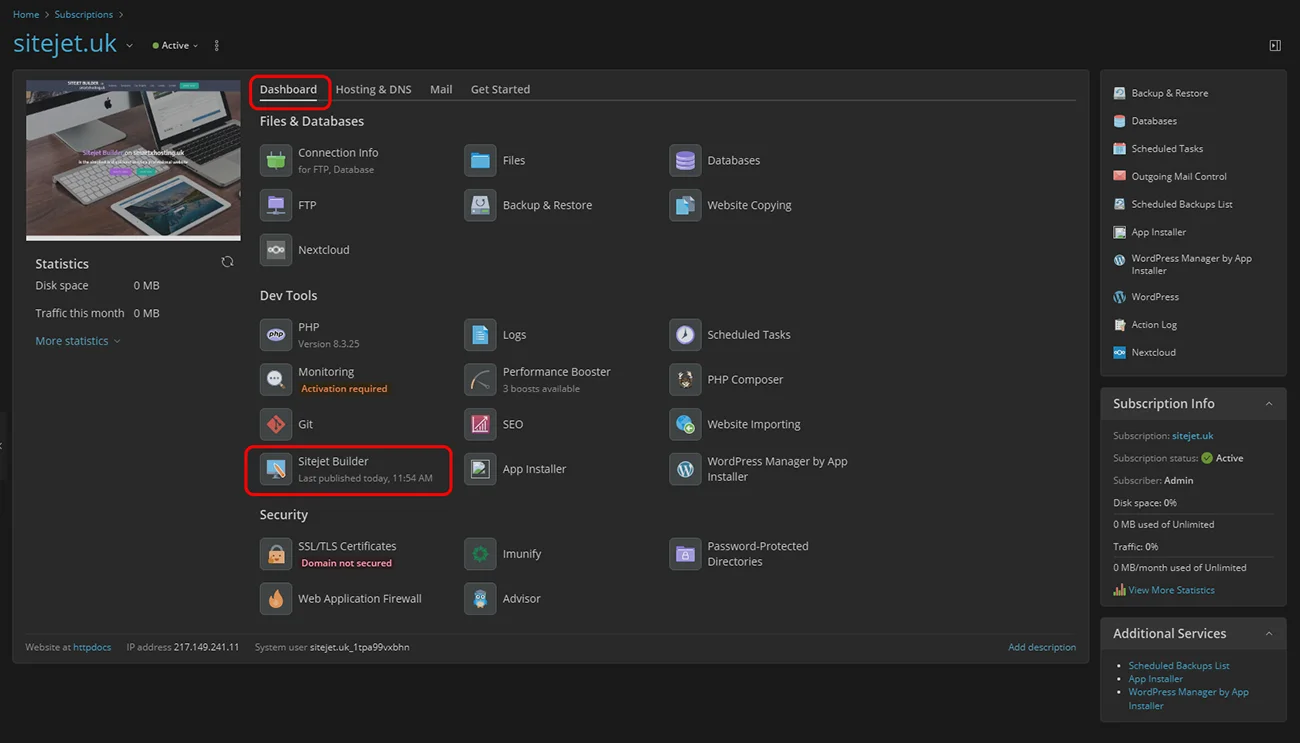
Once the website has been created and published, you will automatically return to the Plesk hosting panel. To reopen the editor to make changes to the site, press the Sitejet Builder button in the Dashboard tab.
© 2025 Smartx Technologies LTF. All rights reserved.